I am pleased to announce that Manitou Springs School District 14 has been named an Apple Distinguished Program for 2012-2013 school year for its 1:1 iPad implementation.
The Apple Distinguished Program designation is reserved for programs that meet criteria for innovation, leadership, and educational excellence, and demonstrate a clear vision of exemplary learning environments.
The selection of our district as an Apple Distinguished Program highlights its successes in enhancing and extending teaching and learning with thoughtful and innovative implementations of technology. Incorporating iPads into the classrooms of Manitou Springs has encouraged teachers to break away from traditional teacher-led instruction and utilize technology to increase student engagement and lead to more active and meaningful student experiences. The district continually works to implement new technologies as a way of learning how they can best serve students.
Way to go staff and students in Manitou!
Friday, December 14, 2012
Sunday, November 11, 2012
Handshakes in Collaborative Projects
Group projects involving one or more classrooms from other schools are a fantastic way to teach the 21st century skills of collaboration and communication. Organizing a formal lesson that focuses on introducing all the students in a project to each other is often referred to as a handshake. Time zone differences and class scheduling often limit the opportunities for students to meet face to face but need not impede the process. Handshakes can also incorporate a variety Web 2.0 tools like wikis (student introductions,) blog posts, vodcast introductions, Voicethread, talking avatars, etc... All the collaborative project needs is a common space to link, embed, or post these handshakes for all other members of the group to view.
Handshakes are so important in that they are the first form of acknowledgement between group members. Handshakes confirm that all involved are in agreement and ready for what is to come in the project. In a global project the handshake unites all members as they embark on a similar voyage. Many times this handshake is the first time many students in the project will interact with someone outside of their school, state, and even country, making the handshake exciting and rewarding.
The handshake also gives students in a project the much needed practice of interacting in appropriate ways with others they don't know online. This practice of experiencing and interacting with new tools is often referred to as the sandbox. The handshake space is very much the sandbox of the global project because it is here that students will learn appropriate methods of online introductions. The handshake a learning space and should be treated as such. Students may make mistakes and instructors or leaders in a the project can easily use these mistakes to educate all on the values of appropriate interactions online.
Prior to initiating a handshake be sure all leaders in the project are familiar with the chosen tool. A good idea is to initiate a handshake with project leaders prior to launching the project with students. Not all schools have access to Web 2.0 tools so be sure to complete any necessary checks on limitations particular schools may have. Some schools have rules against students posting images of themselves online. Know your school rules and instruct students on the appropriate course. Some teachers have students post images that represent the student's interest or use student created avatars.
Wednesday, September 19, 2012
Sharing Documents and Files Using Dropbox
There are various methods Dropbox may be used to share documents and folders with others.
- Share Link via Email
- Pro: Material remains private between sender and recipient of email
- Con: Reliance on Email as a means of communication
- Create a document and save it to Dropbox
- Locate the file in Dropbox
- Select the Link Icon in the upper right window of screen
- Select Email Link
- Share Link via Student Blog
- Pro: Easily publish link for others to view
- Pro: No reliance on Email
- Con: Material is published on web - maybe an issue for younger students depending upon school policy
- Create a document and save it to Dropbox
- Locate the file in Dropbox
- Select the Link Icon in the upper, right window of screen
- Copy Link to Clipboard
- Paste into blog
- Share Folder with a Specific Recipient
- Pro: Entire Contents of a folder are shared with teacher
- Pro: Sender may add documents to folder and recipient has access to this new content
- Con: Entire contents of folder are shared - this could be a problem if enabling camera loads and sharing photo library

- Open the Safari App
- Sign in to the Dropbox website (if you haven't already)
- Click on the file row to the right of the file's name to select it
- Press Get link from the blue action bar across the top of the file browser
- Select Share and add email and message into whare window that appears
- Tap Send

Camera Uploads
The “Camera Upload” feature in Dropbox allows for Dropbox to sweep the Photo Roll of an iPad and upload anything on that Photo Roll to a folder in Dropbox. This allows the student to share the file via a link in an email.This process allows for relatively private sharing between student and teacher as well as a quick and simple answer to the problem of sharing large files created in iMovie. Once the folder is shared, every time students make a create a new iMovie project, it will be easily accessible by the teacher.
Enabling Camera Uploads in Dropbox
- Have students create a dropbox account (http://www.dropbox.com) and download the app to their iPads.
- When signing up for the account, make sure students enable Camera Uploads.
- When on dropbox.com, have students rename their Camera Uploads folder “Camera Uploads-TheirLastName” (this way you can later organize these shared folders in a larger folder on your dropbox account).
- Have students share that Camera Uploads folder with the teacher.
- On the teacher account, you can then put all the student Camera Uploads folders into a single folder, or group by grade or class.
Sunday, September 16, 2012
Building a Digital Citizenship Team of Students
Teaching digital citizenship and responsibility should be at the forefront of every teacher's mind these days as we bring more and more technology into the classroom. I strongly believe students will do the right thing and behave in the right way when they are made aware of what the right thing and the right behavior is exactly. Do do this, our teachers are relying on the material made available for free from Common Sense Media. And though the efforts are notable, I believe additional steps are necessary to truly move students from being skilled in the understanding of digital citizenship to becoming a fluent digital citizen. That's why we're beginning to talk about ways we can develop a student task force to empower safe and ethical use of technology in each and every individual.
In an effort to use reverse mentoring, we're hoping to develop a team of students to reach out to each and every advisory class to be the student liaison to the teacher. If a student is struggling with an issue related to digital citizenship, they can contact their digital citizenship "liaison" to assist them with the matter. There would be one liaison per ~15 students.
These students would be resonsible for the following:
This idea is in it's infancy. I hope to grow it over the next few months so that our community becomes progressive in building digital citizens.
- Understand the areas of awareness of enlightened digital citizenship as well as the rays of understanding that permeate each area
It would be this understanding that would guide responses to crisis or questions other students are currently encountering
- Monitor a group discussion area to foster communication/questions
Student liaisons would be responsible for posting response to questions by students in their group and to pose questions causing the group members to think about scenarios they might someday encounter.
Classroom Monitoring Portal
I recently created a classroom monitoring
portal, (CMP,) using Netvibes for the fifth grade teachers in one of
our elementary schools. You can find it here.
This CMP has a different focus than a typical CMP might have in that it is designed so parents can access information related to student/teacher work and expectations in fifth grade.
Parents were struggling with having to visit so many different pages to access classroom information pertaining to each of the fifth grade teachers. Since each student travels to each of the teachers for a specific content area, parents were having to go to three different websites and more for this information. It was too difficult for parents. Solution - a parent CMP.
This CMP houses individual tabs for the following:
1. Each teacher's google calendar
2. A portal for teachers to enter frequently visited websites
3. A link to classroom wikis
4. All student blogs
5. Class list of blogs
6. News Feed
The google calendar tab allows for the parent to view the classwork and homework related to each teacher on one page yet allows for each teacher to maintain an independent google calendar. Keep in mind the process of learning for many teachers. That's why you won't see much on their calendars. They've just learned about them, love the idea, but haven't used them yet. Things will change in the next week or two.
I have not included feeds for wiki edits/discussions to teacher wikis on this CMP because it is not relevant to the parent and it would confuse them. If I wanted to put a feed in for wiki edits I would do so exactly the way I entered in student blog feeds only I would select the wiki edit or discussion feed for that page.
Teachers have not had a lesson in how to edit the portal to add in their favorite links other than the science teacher. It's part of the process.
I did throw in a tab for news but will take that out eventually. I may choose to put in some feeds relevant to parents related to our district in the future.
This page is a public netvibes feed. I struggled a bit learning about how to move a tab from a private dashboard to a public dashboard. I ended up sharing the link of the tab via an email to myself and then adding it to my public page that way. I could not figure out how to do this in the manage dashboards section of Netvibes. If any of you know how, I'd appreciate the feedback.
Lastly, if this post finds any fifth grade classroom teachers who are interested in sharing blogs with each other, please contact me.

Monday, September 10, 2012
Making the NetVibes Shift
I have always loved and used iGoogle as my feedpage so when I learned in August that Google was retiring iGoogle in October of 2013 I was a saddened. I had created iGoogle tabs to manage my RSS feeds, student blogs, teacher blogs, etc... and the thought of losing this tremendous service was daunting and cumbersome. Enter NetVibes, another feedpage service I was familiar with but not nearly as comfortable. I had used it previously, to create a CMP for 6th grade teachers.
It's a month later and I have slowly transferred my feeds and am in the process of creating student portals for 5th - 12th grades. I like NetVibes because the app is intuitive, plays nicely and shares nicely with others. This is especially handy because I can create various dashboards/tabs and share the public link with students. I can easily email tabs to students and they can add them to their NetVibes dashboard.
 Here's a snapshot of the work in progress. Right now, everything is in one dashboard - soon I'll create multiple dashboards specific to my needs.
It's a month later and I have slowly transferred my feeds and am in the process of creating student portals for 5th - 12th grades. I like NetVibes because the app is intuitive, plays nicely and shares nicely with others. This is especially handy because I can create various dashboards/tabs and share the public link with students. I can easily email tabs to students and they can add them to their NetVibes dashboard.

Going Mobile with the iMovie App for iPad
I am continually looking for ways to make public the content students create on their iPads via student blogs. I love the iMovie App for iPad but it takes a bit of maneuvering to make it "mobile" in order to develop a sweet student/teacher relationship. The iMovie App for iPad is amazing in that anyone can easily create digital stories, tutorials, book trailers, etc... within a short period of time. However, sharing that movie with others is easier said than done. Once a movie is longer than a minute, (pretty easy to do,) the movie cannot be emailed to another user in it's entirety. This presents problems for teachers who are hoping to easily access student created content, including iMovie.
Our students are too young to have their own YouTube account. And, even though we are a Google Apps for Education school, the user agreements for YouTube do not fall under the Google Apps for Education umbrella. So, to get around this dilemma, teachers have created an additional google account to be used specifically for the uploading of video content to YouTube. The username and password of this account are shared with the student and when these students finish an iMovie they send their movies to this account via the action icon in iMovie.
The teacher is in charge of monitoring the site, making sure posts to the site are appropriate and fall within acceptable guidelines. Each teacher has their own account for this purpose.
The nice thing about hosting YouTube accounts in this matter is that the teacher can then use the video manager on YouTube to stitch together student created videos into a longer movie. Recently, a teacher had each student create an iMovie detailing a specific chapter to a novel the class had finished reading. The teacher pieced the clips together and created a ten minute retelling of the book and shared that on their blog site.
In addition, YouTube also provides each account with an email for mobile uploads. When a user has this email, they can easily email video content from their media library directly to the YouTube account. Students can then access the URL of the video from YouTube and post the video to their blog.
Finally, using various blogging apps (we use BlogPress) the student can share their newly created iMovie to their camera roll. Once the teacher created YouTube account is connected to the BlogPress App (in Blogpress Settings) the student can directly post the movie to their blog post and it will upload the iMovie to both to YouTube and to their blog. Once on a student blog, anyone can easily access the video content.
Here's an "unrelated" iMovie about Diigo I made using this method.
Sunday, September 9, 2012
Monday, September 3, 2012
How Do You Communicate?
Synchronous Communication - Participants connect with each other live or at one given time. This type of communication may be accomplished via text and audio/video technologies.
Examples:
Video: Skype, FaceTime, Blackboard, WizIQ
Text: Instant Messaging, Social Networks, Back Channels (Today's Meet)
Asynchronous Communications - Participants communicate regardless of time and space. This type of communication allows multiple participants to access, view, edit, listen and contribute to the conversation anytime or anywhere, regardless of other participants.
Examples:
Video: Recorded Meetings, YouTube,
Text: Google Docs, Wikis, Blogs, Collaborative Calendars, Email, Social Networks
Knowing and understanding the technologies that support both of these types of communications does more than increase the chances for a successful project, they make them fun. They do this because they build on the social aspect of collaboration - building relationship. We, as humans, genuinely want to know people from other places. Most of us value the cooperative group effort toward a common goal. Using online spaces to connect students around a standard makes sense.
Here's an example
I was assigned the task of creating a blog post about Teacherpreneurs with three other people. Once the topic/groups were assigned, class ended.
We had a week to:
- Decide how to get started
- Organize our thoughts in a common place
- Share our blog post with the class
Communication tools were essential in the success of the project. Here's how:
Decide How to Get Started
We used a social network (the FCP ning) to get the ball rolling on this project. A group member shared a chat with all members of the assigned group - checking in, basically starting a hand-shake. This was the first time anyone had worked together and it was essential to say hello and introduce. From there a plan was born. One group member would start a google-doc and we could all jot down our thoughts on the topic in one place.
We used a social network (the FCP ning) to get the ball rolling on this project. A group member shared a chat with all members of the assigned group - checking in, basically starting a hand-shake. This was the first time anyone had worked together and it was essential to say hello and introduce. From there a plan was born. One group member would start a google-doc and we could all jot down our thoughts on the topic in one place.
So far all communication was asynchronous.
The google doc allowed for each participant to work independently, yet collaboratively in one space.
Organize Thoughts in a Common Place
Google docs allows the ability to work in a collaborative environment on one document. Here we could easily write, edit, and revise.
At this point, we were still missing a group member. We used additional forms of communication to attempt in contacting the missing member. Group members chatted synchronously on the ning using the instant messaging feature. From here, members emailed, tweeted, and sent messages to the missing member.
We also used the instant message feature to continue the direction of the post, refining the editing process. We could have done this on the google doc itself, but the immediate feedback the instant message feature allowed for quickened the process.
Share the Blog Post
The post is written, the google doc made public, and the link to the document is shared with the rest of the class. A cooperative and collaborative effort that enhanced the definition of teacherpreneur to all members of the class.

Sunday, September 2, 2012
Diigo Posts (weekly)
-
Update Your Browser | Facebook
Hi, Facebook friends. This image shows you. Or, rather, it's from a detailed analysis of my Facebook peeps in... http://t.co/cNPYsMim
-
Technology "look for's" in teacher evaluations - Home - Doug Johnson's Blue Skunk Blog
-
- hello - post by sheela remetio
Saturday, September 1, 2012
Information Management in an iPad 1:1 Environment
Managing the quantity of student data quickly becomes overwhelming when implementing a 1:1 iPad program. Typically, the focus is on app selection and integration of the technology into classroom practices and the topic of information management is frequently overlooked. This neglect often leaves teachers with with the inability to view student created content with ease and with full email inboxes that quickly become overwhelming.
 There are a few ways we've managed to ease this burden.


- Evernote Premium accounts for teachers, Evernote Free accounts for students.
- Dropbox accounts
- Annotation apps
- Classroom Management System (CMS) like Wikispaces
- YouTube accounts (either teacher or student)
- Student Blogs as portfolios / Netvibes for monitoring
Evernote premium allows a user to create an unlimited number of notebooks and share them with free Evernote subscribers. We use Evernote like this:
A teacher creates a notebook for each student and both the student and teacher can contribute new notes to that notebook. Think of the notebook as a folder and the new notes as a document. The shared notebook feature allows both teacher and student to add content to a notebook at any given time and though not as seamless as the desktop version of Google Docs, Evernote quickly becomes a close second in that it gives student and teacher the ability to work on one version of a document.
The note feature of Evernote has word processing features with the added abilities of including audio and other media including web content.
Lastly, many apps are beginning to integrate with Evernote meaning that after content is created or viewed, a user can easily end the content to an Evernote notebook.
Dropbox accounts allow a user to upload and access documents easily on an iPad. Once a document is uploaded to Dropbox a user can open it in a variety of apps on the iPad. Dropbox also allows a user to easily create a link to a document or to the entire folder. This link can be posted on a CMS like Wikispaces and another user can click on the link using their iPad, and either complete a direct download by choosing an application to open the file or downloading it to their personal dropbox account. And, like Evernote, more and more apps are beginning to integrate nicely with Dropbox. Soon, maybe everyone will play together nicely.
To learn more about using dropbox to share files visit my recent post.
To learn more about using dropbox to share files visit my recent post.
Annotation apps are essential if you are uploading PDF documents to the iPad. These apps let a user download the document onto their device and easily annotate the document. I like neu.Annotate+PDF for students. It's cheap, $0.99 and works great.
A CMS is essential. My favorite is Wikispaces, but whether you use Blackboard, Moodle, Edmodo or wikispaces is irrelevant. A teacher needs to have a platform for collaboration, communication and delivery of content and ideas. At our school we use the Wikispaces Private Label, a secure wiki environment which allows for the creation of unlimited wikis with a similar domain. Wikispaces is rumored to be working on an iPad app, which, if it happens, will allow make the process of creating, collaborating, accessing and communicating with content even easier.
YouTube accounts make disseminating video content a breeze. Unless your students are creating small and short video clips, the option to email video content becomes mute. The files are simply to large to email and personally, I don't want my inbox filled with student content. Many video creation apps offer the "Send to YouTube" option. For students old enough to have a YouTube account, this isn't a problem. For students in the younger grades, we created an additional google account for each teacher. This is the account the teacher shares with students for the purpose of uploading video content. It's not used for much of anything else. After a student creates a video, they send it to their personal, or teachers, YouTube account and then provide the link on their student blog, Evernote notebook, or wikispace page.
Student Portfolio - A place for the student to personalize their learning journey is essential. Each student creates a school blog in which they record this journey. Our younger students use Edublogs, our older students use Blogger. This gives them the opportunity to work in both platforms though we may revisit this next year. Apps like Blogpress and Blogsy allow for easy post creating and editing, including the uploading of media content to blogs.
Teachers can easily monitor student blogs by using a feed page like Netvibes
Teachers can easily monitor student blogs by using a feed page like Netvibes
Finally, as you are choosing apps for the iPad, look for those that integrate with DropBox and Evernote.
We are in year 2 of a 1:1 iPad implementation and we are still learning. I'd love to hear from those of you who have innovative ways to access and share created content using iOS devices.
Monday, August 27, 2012
Surrounding Myself with Excellence
I love the idea of surrounding myself with excellence whether it be experts in pedagogy, school technology, good cooks, and master gardeners. The idea is - excellence breeds excellence and though it doesn't happen through osmosis, somehow the mere idea of being in the presence of excellence transcends and I start exhibiting behaviors that suggest I'm getting a bit more capable of the task at hand.
Joining and participating in the Flat Classroom Teacher Certification Course is no exception to the above. The leaders, Julie Lindsay and Vicki Davis, are exceptional educators bar none. Their work in global collaboration over the years has brought more teachers and students together in a meaningful way that embodies what "flattening the classroom" signifies - kids working together from all parts of the world on relevant topics. But it goes beyond these two women. The cohorts in the group bring experiences and knowledge I've not encountered. They are smart, creative thinking people and I'm surrounding myself with them because I have so much to learn. And the book, Flattening Classrooms, Engaging Minds is well worth the read, everything you wanted to know about flattening the classroom and more.
This week I'm busy relearning Netvibes to serve as my RSS for the course and rethinking about what it means to connect with others and flatten the classroom. I'll work outward. The first step to flattening a classroom is to remove the barriers of the classroom walls and school walls so that the student classroom is a large community, interacting and collaborating with one another. Whether the communication is global or from within the same city need not matter at first. The idea is to cross the barriers and create communication and collaboration in learning where, before the flattening, there was none.
From there this larger community develops relationship and works toward common goals. I like the term Alan November uses - Digital Learning Farms. A flat classroom is similar. The flat classroom is the farm and everyone on the farm works toward the success of the farm. Everyone has a job to do and without one job being performed the overall goal isn't quite met. Everyone needs to come together, work hard, and see their work matters.
But it gets better than just my description. Yvonne Caples, one my cohorts in the group writes:
For me, ‘flattening the classroom’ and ‘flat learning’ are about utilizing technology to expand the audience, the connections, the activities, the outcomes and the learning landscapes to make learning more meaningful, efficient, collaborative, and representative of the flattened work environment that students will enter in their future. Read more.Wow! That's what I'm talking about by surrounding yourself with excellence. And Yvonne's comments echo the others'. It's really cool being part of an amazing group.

Sunday, August 26, 2012
Sunday, August 19, 2012
Diigo Posts (weekly)
-
-
A principal flips his opening faculty meeting.
-
To learn who rules over you, simply find out who you are not allowed to criticize. - Voltaire http://t.co/ZruYTxC3 #edreform
Sunday, August 12, 2012
Saturday, August 11, 2012
Diigo Posts 08/11/2012
-
Turn any surface into a whiteboard with ideapaint.
-
Class uses of evernote.
-
Evernote for lesson planning and assignment sharing
-
This tutorial includes a video explaining how to install Diigolet on the iPad in Safari.
-
The best Diigo overview I have seen. Literally, everything you want to know about Diigo - all except the diigo widget for the iPad.
Friday, August 10, 2012
Diigo Bookmarking Service on the iPad
I've written about the powers of Diigo before on this blog. Diigo is a web service that allows you to collect and highlight and
remember the information that you want to across the web. Things haven't changed as it is still my favorite bookmarking service.
But now, with an almost daily use of the iPad, I'm doing more and more browsing on Safari and I don't want bookmarks in two places. I've been using Diigolet for iPad and it does a terrific job of easily saving bookmarks to Diigo.
 Diigolet is a little java script that allows a user to access their Diigo toolbar from Safari on the iPad. Installing diigolet is a fairly simple process and will be worth every second.
Pre-Steps
- Open the Settings icon on your iPad and choose "Safari" in the left navigation menu. Set Always Show Bookmarks Bar to “ON.” Set JavaScript to “ON.” Set Accept Cookies to “From visited.”
- Go to http://diigo.com and sign in to your Diigo account.
Installing diigolet to Safari on your iPad
- Click the action icon in Safari. This is the small rectangle with the arrow.
- Select "Add Bookmark." Make sure you have selected to add this bookmark to your Bookmarks Bar.
- Click Save.
- Copy the following code: javascript:(function(){s=document.createElement(%22script%22);s.type=%22text/javascript%22;s.src=%22http://www.diigo.com/javascripts/webtoolbar/diigolet_b_h_b.js%22;document.body.appendChild(s);})();
- Select the Bookmarks icon in Safari.
- Select Bookmarks Bar and tap Edit in the upper left of this window.
- Choose the bookmark you saved in the above step.
- Change the name to Diigo Toolbar or something similar - I used Diigo
- Delete the URL shown and paste the new code that you copied in step 4 (press and hold, then release, then tap “Paste.”
- Hit “Bookmarks Bar” located in the bottom top left corner to go back. Click “Done” located in the top right corner. Click the bookmark icon to make it disappear.
That's it! You should now be able to visit a website and tap the Diigo Toolbar Bookmark in your Bookmark Toolbar on Safari and save to Diigo. You'll see this image pop up and you can carry on as normal saving your websites to Diigo. Try it by saving this blog entry.
Lorenzo Orlando Caum posted a great Vimeo tutorial on these steps. His easy to follow, written instructions may be found on his blog.
Wednesday, August 8, 2012
My Digital Backpack
We've had quite a bit of conversation lately on our Summer Institute discussion about learning Web 2.0 Tools and changing technologies. The topic got me thinking about my digital backpack and how I navigate through the many tools inside.
Change is constant and I have learned to count on this each and every day, like it or not. There are good tools and there are "distracting" tools and the more I investigate the more I learn the difference between the two types of tools for my needs. This will be different for everyone and that's why it's important to offer a "backpack" of tools instead of just a handful.
Sometimes a tool I really like and used well get's lost and I'm forced to find a replacement. This isn't easy and I get frustrated, but moving forward is necessary. My backpack (or toolbox) is in a constant state of flux.
A few days ago a member of EdTechTeacher posted, Back to School App-Pack article on his blog. I loved the graphic and wanted to share it with all of you.
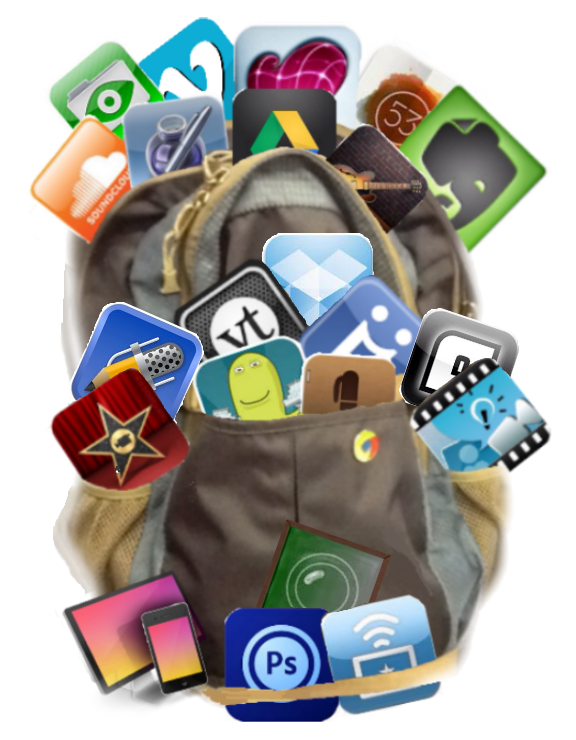
Friday, July 20, 2012
ISTE: Infographics and Data Visualization with David Warlick
I've been fascinated by infographics/data visualization and their use in instruction for some time now so I was thrilled to be able to spend an hour with David Warlick discussing this very topic this year at ISTE. Hopefully, you'll all be as inspired as I was to use infographics with students.
Basically, what separates data visualization and infographics is the artist. Data visualization involves a machine (computer,) programmed to take data and show it in a way that makes sense. Spreadsheet generated graphs for example. Infographics involve an artist designing and laying out the same data instead of the machine. The result is the convergence of interest, number crunching and visual design to tell a story. Infographics are a blend of science, math, and storytelling and that's probably why they are popping up all over the internet and in newspapers and magazines. Visual expressions of stories allow readers to grasp complex concepts because they are easy to read.
Infographics can be used in the classroom in several ways:
- Content discovery and study in which students use infographics to grasp concepts. Introduce students to infographics by visiting the website Infographic-A-Day and complete the suggested activities and discussions with your students. The Daily infographic is another website to practice reading and analyzing infographics with your students. **When using infographics with students always look at the source information** as not all infographics are created using verifiable and accurate data. Two thoughts:
1. The power of data visualization is not in the answers the infographic provides but in the power of the questions the infographic generates.
2. Not all infographics created are meant to be read. Some just look really cool.
The History Of The World Infographic is a good example of an infographic that generates questions and looks really cool.
Weight of the world infographic (This requires flash)
Http://newsmap.jp (This requires flash) - Content creation in which students create their own infographics as they make and convey meaning and understanding of essential concepts they are encountering and learning. Communicate "story" and Teach "telling"
Process
- Start with a theme, introduce to students
- Build background
- Focus on one aspect
- Work in groups
- Collaborate
- Research, struggle with the research
- Reflect, final conversation
- Predict what happens next - extend, apply, extend, apply, extend
Creating infographics empowers learners to dynamically create content, especially to uninspired learners.Tools to create Infographics:
- Google's data explorer - google.com/publicdata/explor
- Stephen Abrahms blog - over 100 incredible tools
- Easel.ly online tool
- Visual.ly - lets you create an infographic summarizing your presence online (facebook and twitter.)
- infogr.am - Use a template to create an infographic
- Comic Life - Mac and iPad app for infographic creation and probably the easiest for mac users
- Www.processing.org - Programming language called processing that allows you to create infographics
- Vector graphics - adobe illustrator, inkscape, art board
- Thoughts: Turn science fairs into data fairs via infographic
Other blog posts on infographics :
Lastly - What Is An Infographic? by InfographiclabsFriday, July 13, 2012
ISTE CEO Don Knezik
We heard a few words from ISTE's current CEO Don Knezik prior to stepping down after 10 years at the helm. Below in bold are the most important lessons learned as the CEO of an organization with 20,000+ members followed by my thoughts in italics.
World class teachers and principals are the most critical inputs to a world class education
Excellence breeds excellence. Higher the best.
Education policy backed by leadership and incentive funding is a game changer
Strong leadership is a must no matter where you are.
Times change and we must be confident and clear about communicating the direction our organizations are headed towards. This paves the road of change.
Learning has no boundaries and we must begin to recognize and value the learning that is taking place outside of the school building and day.
We are stronger together than we are alone no matter if we are collaborator or competitor.
World class teachers and principals are the most critical inputs to a world class education
Excellence breeds excellence. Higher the best.
Education policy backed by leadership and incentive funding is a game changer
Strong leadership is a must no matter where you are.
Accountability based on needs of previous generations doesnt prepare our learners for the future
Times change and we must be confident and clear about communicating the direction our organizations are headed towards. This paves the road of change.
The most important lessons to be learned are not only inside the four walls of a classroom
Learning has no boundaries and we must begin to recognize and value the learning that is taking place outside of the school building and day.
When organizations collaborate kids win
We are stronger together than we are alone no matter if we are collaborator or competitor.
Monday, July 9, 2012
ISTE Field Trip - Alan November's Digital Learning Farm
Many of us would all agree that students learn best when they have a vested interest, a desire or passion in what they are learning. As educators, we are forever working toward capturing that passion in our students by providing learning experiences that are authentic, challenging and relevant to the lives of those we teach. Alan November would take that one step farther, reminding us about the human need to make community contribution and encouraging us to bring this concept to the forefront of lesson planning. This was the backdrop to his ISTE session: Digital Learning Farms - Students as Contributors and it was amazing. Everytime I hear Alan November speak I walk away with something valuable and this session was no exception.
Creating digital learning farms instead of school classrooms comes from the idea that children used to contribute to the family farm via chores. Everyone on the farm had a job to do and these jobs fullfilled a human need to contribute to the community as a whole, giving purpose to the individuals behind the work. Success of the community was dependent upon each and every individual no matter the age. November suggests designing classroom, or digital farm, roles for students to build on this concept. (Check out his article on November Learning for more detailed information.) The roles are:

He then went into describing how the first week of school might better be spent teaching the skills needed to perform these functions throughout the year. In other words spend the first week of school building the capacity for all kids to contribute. My notes are chaotic - there was so much good stuff coming out of this man's brain. Below is my attempt at capturing his brilliance.
Notes: Digital Learning Farms - Alan November
Search Operators
Cheat Sheet For Search Operators
Google Guide for Queries
A Google A Day

Creating digital learning farms instead of school classrooms comes from the idea that children used to contribute to the family farm via chores. Everyone on the farm had a job to do and these jobs fullfilled a human need to contribute to the community as a whole, giving purpose to the individuals behind the work. Success of the community was dependent upon each and every individual no matter the age. November suggests designing classroom, or digital farm, roles for students to build on this concept. (Check out his article on November Learning for more detailed information.) The roles are:
- Curriculum Reviewers
- Tutorial Designers
- Collaboration Coordinators
- Official Scribes
- Researchers
- Contributors to Society
Silvia Rosenthal Tolisano published an incredible chart of iPad apps relative to these jobs on her Langwitches Blog.

Notes: Digital Learning Farms - Alan November
- Farms - everyone has a role, contributes
- Wouldn't it be great if schools worked this way
- Youtube video on Daniel Pink's book, Drive.
- 3 things to increase motivation- purpose, autonomy and mastery
- Purpose - work you do must not only be for yourself
- Autonomy - individual can make their own decisions
- Mastery - go deep into a subject, develops passion
- These three things are largely missing from school for children.
- How to avoid the pitfall - what do i need to do to get an A and then they do no more
- Put teachers who are passionate about teaching into this type of system that doesn't motivate and then you have disaster on all parts. It isn't the teachers fault.
- mathtrain.tv teacher built a library of student designed tutorials. Question - are we underestimating what students can do. None of the tutorials on this website have been graded.
- NEVER GRADE CREATIVE WORK - It is demotivating
- Look at prime factorizationAnother kid says I want to learn this from this video and this kid because my teacher explains things like I already know them. Plus, the video has a rewind button.
- What is going on? Kids will work hours instead of minutes because they have purpose (created for an audience) indicated by the many students who state - thanks for listening
- Create an opportunity for your work to be valued throughout the world
- Assign work that allows children to add value to the world
- First five days of school -
- Day 1. Build capacity for all kids to contribute- every kid learns how to use a screen casting tool so we can teach children how to design tutorials
- Day 2. Official scribe for the day by using ipad to take photos and video to document and reflect on learning collaborating on notetaking together
- Day 3. Advanced research skills - teach how to get the best content from anywhere in the world so students know what quality looks like
- Day 4. Teach children how to think globally by becoming global researches - teach diigo and contribute to a library of researchers. Diigo is an important source for students to use in this world to think globally. Diigo also avoids the pitfall of every kid out for himself by creating a community of learners building a library of resources
- Didn't get day 5
- Teach children how to:
- Collaborate on notetaking
- Build a database on the best student work created
- Make documentaries
- Build a library together using DIIGO
- Pc40sw07.blogspot.com
- Flipped classroom - have the kids working harder than the teacher..
- have videos designed by kids instead of the teacher
- Every day one student is the official scribe
- Do everything we can to enhance conversation with one another
- classblogmeister.com - best first grade website because it is filled with videos the first graders produce. The kids cant read but they can navigate the internet and listen to youtube videos published by kids
- Austrailians are buying a laptop for every 6-12 student in their country.
- Asked teacher - What is the biggest waste of your time? Teacher answers science fair
- Answer - type in award winning science fair projects in google and show it to your class
- Use the :sg after the search to find singapore science fair projects
- Teach kids to go out and find the best examples of student work before they do it themselves, teach the world codes so you teach kids how to search the world for quality
- This would be a good tech tuesday - google search tips
- Kid searched iranian hostage crisis. Point out there are no sources from iran. Would you agree there are iranian points of view different from our own. Show kids how to search via country code lists
- Change the search because iranians wouldnt call it iranian hostage crisis better search : "american hostage crisis":ir
- You must get the other point of view or you will mess it up, you will never understand what you are doing.
- It is no longer sufficient to not teach other points of view.
- Site:k12.*.us. Follow this after a search to find teacher websites
- We should be teaching kids how to look up stuff
Search Operators
Cheat Sheet For Search Operators
Google Guide for Queries
A Google A Day
Sunday, July 8, 2012
ISTE Playgrounds
I loved being active in the playgrounds at ISTE because if you really want to see what others are doing in schools you can see it here. If cloning myself were an option, I would spend some time in each of the playgrounds just to catch a glimpse of amazing ideas and projects in action. For those interested, each of the playgrounds are sponsored by one of ISTE's special interest groups or SIGs. The wikis associated for each of the SIGs hold resources from several past ISTE conferences and are definitely worth a visit. Take a look at the Media Specialist SIG wiki and check out the 2012 ISTE resources.
 At the Media Center Playground I spent some time with Linda Doughtery talking about Infographics and then connecting with Jennifer Garcia whom I met several years ago and have since worked with on a few collaborative projects. Jennifer's school wiki is full of terrific resources and ideas for the classroom.
The following day I spent some time in the Virtual Environment Playground. The idea of using virtual environments to teach has always been an interest of mine ever since I dabbled in Second Life for a research project a few years ago. I like the thought of students coming to class, signing on and participating in live discussions taking place in another world because it brings a sort of annonymity to the classroom where preconceived notions and ideas about students and their abilities fade away. I went to learn more and the session I attended was a great way for a begiiner like me to be introduced to the vocabulary and possibilities about using virtual environments in the classroom. My notes are below:


The following day I spent some time in the Virtual Environment Playground. The idea of using virtual environments to teach has always been an interest of mine ever since I dabbled in Second Life for a research project a few years ago. I like the thought of students coming to class, signing on and participating in live discussions taking place in another world because it brings a sort of annonymity to the classroom where preconceived notions and ideas about students and their abilities fade away. I went to learn more and the session I attended was a great way for a begiiner like me to be introduced to the vocabulary and possibilities about using virtual environments in the classroom. My notes are below:
- Virtual Reality
- Prezi on mixed realities
- Prezi.com/is0vrxmzbhhc/mixed-realities/
- Augmented Reality - Think of the first down lines superimposed on the television screen when watching football.
- Alternate Reality Game - give them a role andd a challenge and have them play the situation out -give them the rabbit hole leave breadcrumbs along the way and then teachers get to be the puppetmasters, leave them challenges
- TINAG this is not a game
- Games often don't allow kids to build, only play
- Machinima - blend of cinema and machine
- Go into a virtual world and have them so screencaptures for tutoials
- MOOC massive inline open course - connectivism, social network knowledge construction
- Mixed realities matter because they are persistant, social based, sense of shared space, rea-time, copressence, interaction, embodiment, immersion
- transmedia is the ability to follow the flow of stories and information across multiple modalities
- The ability to adopt alternative identities for purposes of improvisation and discovery
- Play the capacity to use your surroundings as problem solving, hard- fun( horrible until you get it right)
- Collective intelligence the ability to pool knowledge and compare noted with others toward a common goal
- You can augment what students are doing
- Second Life
- Minecraft
- World of Warcraft
- Club Penguin
- Warhammer online - students made characters and had to defend
- Joycadia grid - open sim
- Eveonline ( is checking this out)
- PD - p2pu.com peer tp peer university
- P2p university is free online university
- Virtual worlds tour class
- Machinima online open course
- ARG academy course
- Big G games Jim G games for change conference, arizona state university good research on games in education
- Affinity groups - groups outside the game that do research on a topic
- Communities of practice - learn how your communitieds talks and behaves
- ARG prime - july 9 - july 23. Choose edison or tesla, who would you save
- Games based learning MOOC july 9 five week
- Tuesday 5:30. - 7:30, machinima fest here at iste in room 5 and in second life
- Play as professional development
Saturday, July 7, 2012
Notes From ISTE12 - Where to Start?
Sometimes returning home from ISTE is similar to attending ISTE for the first time. It can be a bit overwhelming in regards to adequately disseminating the information gleamed and gained. There was just so much. Time to dive in and start with an overview.
 A few minutes after registerring I went upstairs to the SAILS Pavillion in the San Diego Conference Center. This incredible space hosts the learning playgrounds, information booths, the bookstore and various cafes including my favorite, The Blogger's Cafe. Someone later posted on twitter a 360 degree photo from The Blogger's Cafe asking others - "What if your classroom looked like this?". Small area set up around the room for discussion, learning, quiet reflection and celebration. Notice there aren't any desks yet there was a tremendous amount of work being accomplished.
 Stepping outside of the conference center toward the San Diego Bay and Coranado Island provided the opportunity to capture a bit of southern California sunshine, reflect with others about recent sessions and grab a bite to eat. The entire convention center got me in the mood to learn.
Following a quick look around I attended Social EduCon, a free un-conference that is in its fifth year of running on the day before the ISTE Conference officially begins. It's considered an un-conference because sessions aren,t determined in advance. In stead, participants pitch ideas by writing the topics down on chart paper and then vote by placing checkmarks down beside the idea. Quickly a wiki is established to host a schedule and information regarding the discussions. Some discussions are in rooms, others in the hallways all carry the same theme - dialgue and conversation around the topic. Educators are a passionate bunch and the discussions were filled with sincerity and an intensity that made you want to do as much as you could to be a part of the transformation in education. I felt priveldged to be amongst such genius.
The ISTE conference kickoff was Sunday afternoon followed by the Opening Keynote, a panel hosted by Sir Ken Robinson. Years ago, after I had just joined Twitter I read Robinson's book, The Element. Powerful. He was one of my first folllowers on Twitter and I remember being thrilled. At any rate, I've long been a fan of his work and beleive in his message of the need of transforming education. Following the keynote I attended a question and answer session with Sir Ken Robinson, Marc Prensky and Shawn Covell. Below are my notes from these sessions.

I purposely attended two learning playgrounds during two separate days at ISTE. These sessions were some of my favorite due to the sizes of the groups. The Virtual Reality playground session was small group (more on that later) and the Media Specialist playground was one on one. And though the furniture was probably a bit more upscale than what one would find in a public school, spare couches and chairs might go a long way in part of the transformation. Getting away from the need to have the same number of desks as students would be a start in freeing up valuable floor space.
Stepping outside of the conference center toward the San Diego Bay and Coranado Island provided the opportunity to capture a bit of southern California sunshine, reflect with others about recent sessions and grab a bite to eat. The entire convention center got me in the mood to learn.Following a quick look around I attended Social EduCon, a free un-conference that is in its fifth year of running on the day before the ISTE Conference officially begins. It's considered an un-conference because sessions aren,t determined in advance. In stead, participants pitch ideas by writing the topics down on chart paper and then vote by placing checkmarks down beside the idea. Quickly a wiki is established to host a schedule and information regarding the discussions. Some discussions are in rooms, others in the hallways all carry the same theme - dialgue and conversation around the topic. Educators are a passionate bunch and the discussions were filled with sincerity and an intensity that made you want to do as much as you could to be a part of the transformation in education. I felt priveldged to be amongst such genius.
The ISTE conference kickoff was Sunday afternoon followed by the Opening Keynote, a panel hosted by Sir Ken Robinson. Years ago, after I had just joined Twitter I read Robinson's book, The Element. Powerful. He was one of my first folllowers on Twitter and I remember being thrilled. At any rate, I've long been a fan of his work and beleive in his message of the need of transforming education. Following the keynote I attended a question and answer session with Sir Ken Robinson, Marc Prensky and Shawn Covell. Below are my notes from these sessions.
- Marc Prensky, Brain Gain What do we keep in our heads and what so we let our machines outsource?
- Cellophane kids - teachers look past kids and see test scores and curriculum only.
- 1/2 the world is under 25 and all the educational decisions come from people over 25
- Let kids make these decisions
- Courage - feel the fear and do it anyway
- Alternative
- All use a personalized curriculum
- Allowing students to teach each other and therefore mastering the content
- Everyone needs to have their own curriculum based upon interest
- Find your affinity group where you fit in the top 20percent
- Lots of room for improvisation within our schools
- More digital devices than people in this world by the end of the year.
- Our dollars must go to products that work toward s personalizing education
- Get rid of the word delivery when we talk about education - lets talk about teaching
- Don't ride yesterday's horse
- Coaching students to find what is inside of students and encourage them to make it better. A teacher's role is to become more of a coach and less of a deliverer.
- Affinity grroups not personalized learning groups
- Teachers must empower themselves
- There is much more room for innovation in the system then school officials realize..
- There is more freedom than teachers often recognize
- School of one. New york city Every kid in the school has a personal time table
- 20% rule 4 hours a week people can deliver classes basesd on interest and passion. Can either be taught by teachers or 8 year olds
- Let technology unleash the schedule
- If you dont know what kids are interested in... You shouldnt only do what kids are interested in because often they don"t know. Part of our jobs is to expose kids to their interests they didn't know existed.
- You can teach kids creativity by providing processes which allow them to be creative. ( open ended questions)
- Howbart school teaching shakespeare - create a sense of common purpose and self-fullfillment
- People who don't know themselves spend too much time in the noise of the world
- Three kinds of people: Those who are removeable, those who are moveable and people who move. If enough people move you have a movement.
Tuesday, June 19, 2012
ISTE 2012
ISTE 2012 in San Diego is just around the corner. It's the time of year where excitement builds because the idea of spending five days with incredible leaders in the area of educational technology is over the top. It's a time to meet up with old friends from around the globe as well as make new friends.
What I love most about ISTE is that everyone is friendly, willing to share, and is there to learn from each other. I've made some incredible connections with fellow educators wanting to collaborate and work together from afar.
If you’re going to be there, look for me in the Bloggers’ Cafe or at any of the sessions I've listed below. I still have a bit of work narrowing down my session choices but that's the fun part of attending an incredible conference.
The twitter feed, (#ISTE12, #ISTE2012,) is worth following even if you aren't in attendance.
California, here I come!

California, here I come!
Conference Planner for Lisette Casey
|
| Sunday, June 24 | ||
| 1:30-3:00pm |
Conference Kickoff and Member Celebration [Concurrent Session; Keynote]
Location: SDCC Hall B1 Mario Armstrong, Mario Armstrong Media, LLC with Peggy Sheehy |
|
| 5:45-7:00pm |
Redefining Horizons: Encouraging Students' Passion to Achieve [Concurrent Session; Keynote]
Location: SDCC Hall B1 Sir Ken Robinson, with Mayim Bialik, Peggy Johnson and Marc Prensky |
|
| 7:00-8:30pm |
Flat Classroom Projects--Transform Learning through Global Collaboration [Learning Station Session; Global Collaboration Project]
Location: SDCC Halls DE Lobby, Table 39 Julie Lindsay, Beijing (BISS) International School with Susan Davis and Vicki Davis |
|
| Monday, June 25 | ||
| 8:30-9:30am |
Stratosphere: Integrating Technology, Pedagogy, and Change Knowledge [Concurrent Session; Spotlight]
Location: SDCC 6C Michael Fullan, Ontario Institute for Studies in Education, University of Toronto |
|
| 8:30-9:30am |
BM100
Best High School Educational Apps for iPads, iPhones, and Mobile Devices [Concurrent Session; BYOD]
Location: SDCC 30AB Alice Christie, Arizona State University |
|
| 11:00am-12:00pm |
TPACK: Will You Know It When You See It? [Concurrent Session; Spotlight]
Location: SDCC 10 Judith Harris, College Of William & Mary |
|
| 11:00am-12:00pm |
Digital Learning Farm: Students as Contributors [Concurrent Session; Spotlight]
Location: SDCC Ballroom 20CD Alan November, November Learning |
|
| 11:00am-12:00pm |
BM107
Creative Collaboration Using Comic Life [Concurrent Session; BYOD]
Location: SDCC 31AB Sallie Warnecke, Canyons School District with PJ Giles |
|
| 12:45-1:45pm |
Spreading the Word: Eight Ways to Start Conversations around Change [Concurrent Session; Spotlight]
Location: SDCC 6F Will Richardson, Powerful Learning Practice with Rob Mancabelli |
|
| 2:30-3:30pm |
Empathy: The 21st Century Skill [Concurrent Session; Spotlight]
Location: SDCC 6F Alan November, November Learning |
|
| 4:15-5:15pm |
Beyond Googling: Using Technology To Build A Culture of Inquiry [Concurrent Session; Spotlight]
Location: SDCC 6E Chris Lehmann, Science Leadership Academy |
|
| 5:30-6:45pm |
Flat Classroom and Global Collaboration [Concurrent Session; Birds-of-a-Feather]
Location: SDCC 30CD Julie Lindsay, Beijing (BISS) International School with Vicki Davis |
|
| 5:30-6:45pm |
Personalize Learning for Every Learner [Concurrent Session; Birds-of-a-Feather]
Location: SDCC 25C Barbara Bray, My eCoach with Kathleen McClaskey |
|
| Tuesday, June 26 | ||
| 10:30-11:30am |
What's It Means To Be a Digital Leader? Unpacking the NETS*A [Concurrent Session; Lecture]
Location: SDCC 1 Steven Anderson, Winston-Salem/Forsyth County Schools with Kyle Pace |
|
| 10:30-11:30am |
Office of Educational Technology [Concurrent Session; Lecture]
Location: SDCC 8 Karen Cator, US Department of Education with Richard Culatta |
|
| 12:15-1:15pm |
AA4CC: Applying Apps for Communication and Creativity [Concurrent Session; Lecture]
Location: SDCC 6A Ben Smith, Red Lion Area High School with Jared Mader |
|
| 2:00-3:00pm |
A Broader Perspective on Data: Infographics and Visualization [Concurrent Session; Spotlight]
Location: SDCC 6E David Warlick, The Landmark Project |
|
| 2:00-3:00pm |
BT210
Best Middle School Educational Apps for iPads, iPhones, and Mobile Devices [Concurrent Session; BYOD]
Location: SDCC 30AB Alice Christie, Arizona State University |
|
| 3:45-4:45pm |
Personalized Learning Toolkits: Designing New Pathways for Every Learner [Concurrent Session; Lecture]
Location: SDCC 6D Barbara Bray, My eCoach with Kathleen McClaskey |
|
| 5:00-6:15pm |
Digital Jam: A Rocking Event with iPads, iPods, and You! [Concurrent Session; Birds-of-a-Feather]
Location: SDCC 33AB Kevin Honeycutt, ESSDACK with Ginger Lewman |
|
| Wednesday, June 27 | ||
| 8:30-9:30am |
The Evolving Face of Leadership in 21st Century Schools [Concurrent Session; Lecture]
Location: SDCC 26A Patrick Larkin, Burlington High School |
|
| 8:30-9:30am |
It's All About You: Next Steps for Personalized Learning [Concurrent Session; Lecture]
Location: SDCC 6E Richard Culatta, US Department of Education with Karen Cator |
|
| 8:30-9:30am |
BW301
CITW: Apps that Work [Concurrent Session; BYOD]
Location: SDCC 30CD Elizabeth Hubbell, McREL with Matt Kuhn |
|
| 10:15-11:15am |
Beyond Literacy & Numeracy in the Digital Age [Concurrent Session; Spotlight]
Location: SDCC 6F Ian Jukes, 21st Century Fluency Project with Lee Crockett |
|
| 11:45am-12:45pm |
Inside the New Idea Factory: Strategies to Foster Student Innovation [Concurrent Session; Lecture]
Location: SDCC 9 Suzie Boss, Edutopia |
|
| 11:45am-12:45pm |
Teaching Math through Blended Learning--Yes, You Khan Academy [Concurrent Session; Lecture]
Location: SDCC 25B Kami Thordarson, Los Altos School District with Courtney Cadwell, Alyssa Gallagher and Kelly Rafferty |
|
| 1:15-2:15pm |
Apps, Apps Everywhere: Top iPad Apps for Digital Age Learning [Concurrent Session; Lecture]
Location: SDCC 1 Kimberly LaPrairie, Sam Houston State University with Daphne Johnson and Marilyn Rice |
|
| 1:15-2:15pm |
Learning 2.0: How Social Media is Redefining Learning and Teaching [Concurrent Session; Panel]
Location: SDCC 6C Steve Hargadon, Classroom 2.0 |
|
Subscribe to:
Comments (Atom)